

Backyard Hockey Rink Installation in Winnipeg: Cost, Setup & Maintenance
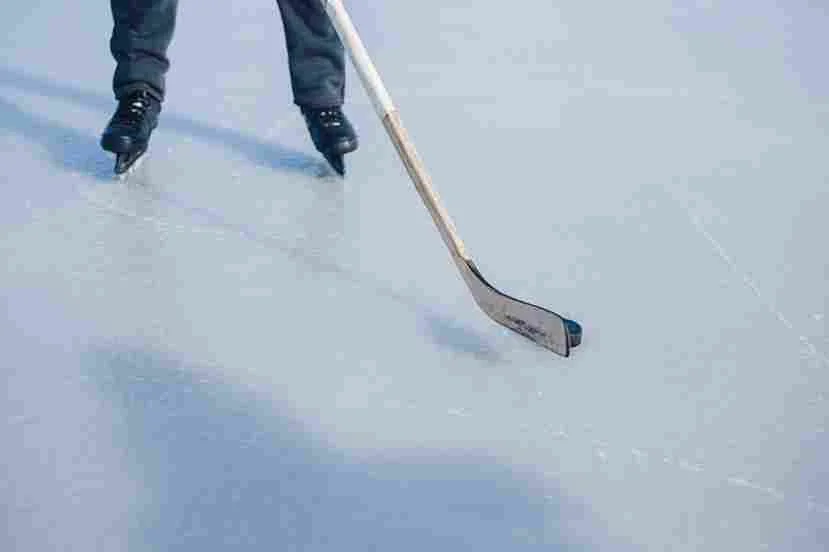
If there's one city in Canada where a backyard hockey rink makes complete sense, it's Winnipeg. The winters are long, the cold is reliable, and the culture around the game runs deep. Families across Transcona and St. Vital have been flooding backyard rinks for generations — but the difference between a rink that delivers a full season of great ice and one that frustrates the family with uneven surfaces, constant flooding problems, and early spring deterioration comes down entirely to how it's built and maintained. A properly installed backyard hockey rink Winnipeg property can support delivers months of reliable skating from late November through March most years, becoming the centrepiece of winter family life in a way that few other backyard investments can match.
This guide covers everything Winnipeg homeowners need to know before installing a backyard rink — from site assessment and sizing to liner selection, flooding technique, and the maintenance practices that separate good ice from great ice through a Manitoba winter.
Key Takeaways
Winnipeg's climate is genuinely ideal for backyard hockey rinks — cold arrives reliably and stays long enough for a full season of use
Proper site assessment and levelling before installation determines ice quality for the entire season
Rink liner selection, board system quality, and flooding technique are the three variables that most affect ice performance
Professional installation eliminates the most common setup errors that lead to leaks, uneven ice, and structural failures
Maintenance through the season — regular flooding, snow clearing, and crack repair — keeps ice conditions at their best
A professionally installed backyard rink adds meaningful property appeal and family value beyond the initial season
Overview: Why Winnipeg Is the Perfect City for a Backyard Hockey Rink
Winnipeg's winter climate is one of the few in Canada that genuinely supports a full-season backyard rink without the uncertainty that plagues installations in milder cities. Average daytime temperatures stay consistently below freezing from late November through mid-March. Nighttime temperatures during the core of winter regularly drop to -20°C or below — ideal flooding conditions that build thick, hard ice quickly and hold it through temperature fluctuations that would melt marginal rinks elsewhere.
The practical result is that a well-built backyard hockey rink Winnipeg property supports can deliver four to five months of skating most years — a return on investment that's difficult to match with any other single outdoor feature. Families who install rinks consistently report that it transforms winter from a season to endure into one the whole family looks forward to.
Bulger Brothers Landscape helps Winnipeg homeowners build backyard rinks that deliver reliable, high-quality ice through the full Manitoba winter — from initial site assessment and levelling through board installation, liner placement, and the first flood. This guide draws on that experience to walk you through every decision point in the process.
Site Assessment: The Foundation of a Great Backyard Rink
Every successful backyard hockey rink project begins with an honest assessment of the installation site. The condition and characteristics of your yard directly determine what kind of rink is achievable and what preparation work is required before installation begins.
Yard Size and Rink Dimensions
The first practical question is how much usable space your yard provides. A full NHL rink is 61 by 26 metres — obviously not achievable in a residential backyard. But meaningful hockey and skating experiences are available at much smaller sizes, and understanding what dimensions your yard can support helps set realistic expectations.
Practical backyard rink sizes for Winnipeg properties:
Small recreational rink (4 by 6 metres or smaller): Suitable for young children learning to skate, limited space yards, or purely recreational skating without stickhandling or shooting
Mid-size family rink (6 by 9 to 8 by 12 metres): The most common size for Winnipeg residential installations — large enough for meaningful shinny games with kids, skating circles, and shooting practice
Full backyard rink (10 by 15 metres or larger): Requires significant yard space but delivers a genuine hockey experience for older players — large enough for real game play with boards, nets, and adequate skating room
For detailed guidance on rink dimensions and what each size supports in terms of actual use, the hockey rink size guide covers standard and custom dimensions in depth.
Yard Levelling — The Most Critical Site Factor
The single most important site characteristic for a backyard rink is level ground. Water seeks its own level — on a sloped surface, it runs to the low end before freezing, creating ice that is thick on one side and dangerously thin on the other. On significant slopes, water runs out from under the boards entirely before it can freeze.
Many Winnipeg yards have more slope than they appear to at casual inspection. A grade change of as little as 10 centimetres across the rink footprint creates noticeable ice thickness variation. Grade changes of 20 centimetres or more make adequate ice construction very difficult without corrective work.
Options for addressing slope:
Rink boards built up on the low side: For modest grade changes, boards can be set higher on the low side of the rink to contain the water while it freezes to level. This approach works reasonably well for grade changes under 15 to 20 centimetres and is the simplest solution for mildly sloped yards.
Yard grading and levelling: For more significant slope, professional yard grading creates a genuinely level surface that makes rink installation straightforward and produces better ice quality throughout the season. Levelling also improves the yard's usability for other purposes once the rink comes down in spring.
Professional yard grading completed before rink installation is an investment that pays dividends in ice quality every season the rink is in use — and continues to benefit the yard for summer use long after the rink season ends.
Drainage Considerations
Where does the water go when the rink melts in spring? A large rink holds a significant volume of water — a 10 by 15 metre rink with 10 centimetres of ice contains approximately 15,000 litres. When that ice melts over the course of a few weeks, that water needs somewhere to go without flooding the yard, damaging landscaping, or pooling against the foundation.
Assess the natural drainage pattern of your yard before installation and confirm that melt runoff will flow away from structures and toward appropriate drainage outlets. Properties with existing drainage challenges may require professional drainage services to handle rink melt without creating spring flooding problems.
Proximity to Structures and Utilities
Maintain adequate clearance between the rink and structures — the house, garage, fence, and sheds. Recommended minimum clearance from structures is typically 1.5 to 2 metres, accounting for the space needed to flood effectively and for safe skating approaches to the boards.
Check for underground utilities before any excavation or significant stake driving. Winnipeg has a robust one-call service for utility locates — use it before any ground disturbance in the rink footprint.
Rink Components: What Goes Into a Quality Installation
A backyard hockey rink has four primary components — the board system, the liner, the flood water supply, and the playing surface itself. The quality of each component directly affects the ice you skate on.
Board Systems
The boards are the structural frame of the rink — they contain the water during flooding, define the playing surface, and provide the physical boundaries for skating and play. Board quality varies enormously, and the difference between budget and professional-grade systems shows quickly in a Winnipeg winter.
Common board system options:
Wooden boards: Traditional 2x10 or 2x12 lumber boards are the classic DIY solution. They're affordable and widely available, but require annual repair or replacement as the freeze-thaw cycle and moisture exposure deteriorate the wood. Wooden boards warp, crack, and lose structural integrity over successive seasons. Screws and fasteners rust and loosen, creating gaps that allow water to escape during flooding.
Plastic or PVC board systems: Manufactured board systems using recycled HDPE plastic or PVC panels are significantly more durable than wood. They don't warp, rot, or absorb moisture, and most systems are designed for fast assembly and disassembly without tools. Higher-quality plastic systems maintain their shape and sealing through multiple seasons without the annual repair cycle that wood requires.
Steel-framed systems: For permanent or semi-permanent installations, steel-framed board systems provide the most structural rigidity and longest service life. They're the choice for serious installations where longevity and ice quality are the primary considerations. Higher upfront cost is offset by multi-decade service life with minimal maintenance.
Corner boards: Radius corners — curved rather than square — improve skating safety significantly by eliminating the sharp 90-degree angles where board-to-board connections create impact hazards. For family rinks used by children, radius corners are strongly recommended.
Rink Liners
The liner is the waterproof membrane that sits inside the boards and holds the water as it freezes into ice. Liner quality is directly linked to ice quality — a poorly selected or improperly installed liner creates leaks, thin spots, and inconsistent ice thickness that affects skating through the entire season.
Liner thickness: Measured in mils (thousandths of an inch), liner thickness ranges from 6 mil on the low end to 40 mil or more for professional installations. For a Winnipeg backyard hockey rink, 6 to 8 mil liners are the minimum appropriate thickness — thinner liners tear easily during installation, puncture from frozen grass and debris beneath the ice, and fail at seams under the stress of thick ice.
A 20 mil or heavier liner is recommended for rinks expecting heavy hockey play — the impact of pucks, skate blades, and general physical contact during play creates stress that thin liners don't tolerate well over a full season.
White vs clear liners: White liners reflect light and give the ice surface a more traditional rink appearance. They also make it significantly easier to see pucks on the ice — a practical advantage for hockey play. Clear liners are less expensive but leave the ice with the grey-green appearance of the grass beneath, which affects the playing experience and puck visibility.
Pre-cut vs custom liners: Pre-cut liners sized for standard rink dimensions are convenient and cost-effective for common sizes. Custom-cut liners are available for non-standard dimensions and shapes, ensuring a proper fit without excess material that creates folding and pooling issues.
Flooding Infrastructure
The water supply for flooding is a practical consideration that deserves planning before installation. Outdoor hose bibs in Winnipeg are winterized before freeze-up — meaning your normal exterior water connection is unavailable during rink season. A dedicated rink flooding connection — typically a laundry or utility sink connection run through the basement wall or garage — is necessary for effective flooding through the season.
A flooding hose should be drained after every use and stored indoors between floods. A hose left outside between floodings will freeze solid and become unusable — one of the more frustrating DIY rink maintenance experiences in a Winnipeg winter.
For larger rinks, a rink resurfacer attachment — a flooding bar that distributes water evenly across the full width of a pass — produces more consistent ice quality than flooding from a single point. These devices are available for residential use and make a meaningful difference in ice quality for rinks over 8 metres wide.
Building the Ice: Flooding Technique for Winnipeg Conditions
The quality of your backyard hockey rink Winnipeg installation ultimately depends on how the ice is built and maintained through the season. Proper flooding technique produces hard, smooth, clear ice. Poor technique produces bumpy, rough, opaque ice that deteriorates through the season.
The First Flood
The first flood is the most important. It establishes the base layer of ice that every subsequent flood builds on — if the base is uneven, every layer above it will be uneven.
Conditions for the first flood: wait for sustained temperatures of -10°C or colder before the first flood. Flooding in marginal temperatures produces ice that sets slowly, runs under the liner edges, and creates a weak base that doesn't support subsequent floods well.
First flood technique: flood in thin layers — 2 to 3 centimetres at a time — allowing each layer to freeze completely before adding the next. Building ice through multiple thin layers produces a denser, harder, more transparent ice than attempting to flood the full depth at once.
Allow 48 to 72 hours at -10°C or colder for the base layer to freeze completely before adding additional floods. Checking ice thickness before skating begins — minimum 5 to 7 centimetres for adult skating, 10 centimetres or more for hockey — ensures the base is adequate before use.
Maintenance Flooding Through the Season
Once base ice is established, regular maintenance flooding keeps the surface smooth, fills skate cuts, and repairs damage from play. Flooding frequency depends on use intensity — a rink used heavily by older players may need flooding every two to three days; a recreational family rink may need flooding once or twice per week.
Winnipeg flooding conditions: the ideal flooding temperature is -5°C to -15°C. Too cold — below -20°C — and water freezes before spreading evenly, creating a rough, opaque surface. Too warm — above -3°C — and new ice sets slowly and may not freeze completely before the next use.
Flood in the evening after the temperature has dropped from the day's high. Evening flooding allows the full overnight cold period for the new ice to set before morning skating. Flooding in the afternoon during a warming trend produces poor results.
Apply thin layers — 3 to 5 millimetres per pass — moving the hose or flooding bar steadily across the full surface. Flooding too thickly in one pass creates uneven ice as the outer edges freeze before the centre, producing a convex surface that accelerates edge deterioration.
Snow Management
Snow on the rink must be cleared before flooding — flooding over snow produces white, opaque, soft ice that skates poorly and deteriorates quickly. Shovel or snow blow the rink surface after every significant snowfall before conditions are right for the next flood.
Use a snow blower or shovel designed for rink use — metal shovels with sharp corners damage the liner and ice surface. Purpose-built rink shovels with plastic or rubber edges clear snow without the damage that metal creates.
For rinks on Winnipeg properties where significant snow accumulation is common, professional residential ice rink snow clearing keeps the surface game-ready without the physical demand of manual snow clearing after every Manitoba snowfall.
Seasonal Maintenance: Keeping Your Rink in Top Condition
A backyard hockey rink Winnipeg installation requires consistent maintenance attention through the season to deliver reliable ice quality from first freeze through spring melt.
Regular Ice Inspection
Walk the ice surface regularly — before and after skating sessions — looking for cracks, holes, and areas of thin ice. Catching problems early and flooding them immediately prevents small issues from becoming large ones.
Common ice problems and solutions:
Skate cuts and gouges: Normal wear from regular use. Fill with thin floods immediately after skating while the ice is cold and the cuts are fresh.
Cracks: Can result from dramatic temperature drops, heavy impacts, or liner issues beneath the ice. Flood cracks with water and allow to freeze before resuming use. Large cracks that reopen repeatedly may indicate a liner leak requiring investigation.
Frost and rough surface: Caused by flooding in very cold conditions or flooding over frost. Scrape the surface with a hand scraper before the next flood to improve adhesion.
Snow ice: White, opaque ice caused by flooding over snow. Scrape and remove snow ice layers before flooding with clear water for best results.
Boards and Liner Inspection
Check board connections and liner edges regularly through the season. Boards that have shifted or settled create gaps where water escapes during flooding — wasting water and producing uneven ice at the board edge. Resecure loose boards promptly and address any liner gaps before the next flood.
Inspect the liner for punctures along the ice surface perimeter — areas where the liner transitions from ice-covered to exposed are most vulnerable to physical damage. Repair punctures with liner repair tape rated for cold-temperature application.
Temperature Management
Understanding Winnipeg's temperature patterns through winter helps plan maintenance flooding for optimal results. The coldest period — typically late December through February — produces the best flooding conditions and the most durable ice. The shoulder periods of late November and March require more careful timing, as temperature variability makes flooding results less predictable.
Monitor the forecast and plan major flooding work for periods when sustained cold is expected. Avoid heavy flooding immediately before predicted warm spells that will compromise new ice before it fully sets.
Spring Decommissioning
Taking the rink down correctly in spring protects both the equipment and the yard for the following season. As temperatures consistently rise above freezing in March, the ice begins deteriorating rapidly — spring ice is typically rough, soft, and no longer safe for skating before it disappears entirely.
Remove boards before the ice melts completely — boards left in place as ice melts settle into soft spring ground and become difficult to move cleanly. Drain the liner by creating a small opening at the lowest point of the rink and allowing meltwater to drain gradually rather than pooling.
Clean and dry boards thoroughly before storage. Wooden boards require inspection for rot and deterioration — damaged boards should be replaced rather than stored for another season of failed performance. Plastic and steel systems should be cleaned and stored in a dry location.
Fold and store the liner carefully. Avoid folding on the same lines every year — repeated folding in the same locations creates fatigue cracks in liner material over time. Store the liner in a location where it won't be exposed to UV degradation, rodent damage, or physical stress during the off-season.
Professional Installation vs DIY: What the Difference Looks Like
Many Winnipeg families build their first backyard rink through a DIY process — and some produce excellent results. The gap between DIY and professional installation becomes most apparent in three areas: site preparation, board system quality, and liner installation technique.
Where DIY backyard rink projects most commonly fall short:
Inadequate site levelling is the most common source of ongoing frustration. A yard that appears level to casual inspection may have 15 to 20 centimetres of grade variation across the rink footprint — enough to create significant ice thickness variation that affects skating quality and safety through the entire season. Professional site assessment with accurate measurement identifies and addresses this before installation.
Underestimating liner importance leads to mid-season failures. Budget liners from hardware stores are typically 4 to 6 mil — adequate for modest recreational use but prone to puncture and seam failure under hockey conditions. Professional installations use appropriate liner thickness for the intended use, properly sized with adequate overlap and edge management.
Board system shortcuts create flooding problems that persist through the season. Boards that aren't properly sealed at the base, corners that don't seal adequately, and boards built up on the low side without proper structural support all create leak points that waste flooding effort and produce uneven ice.
Professional installation of a backyard hockey rink Winnipeg property supports addresses all of these variables from the start — producing reliable results in the first season rather than requiring multiple seasons of troubleshooting to achieve good ice.
For maintenance guidance through the season, the backyard ice rink maintenance tips guide covers flooding technique, snow management, and ice repair in detail specific to Winnipeg conditions.
Backyard Hockey Rink Winnipeg Cost Ranges
Understanding realistic costs helps families plan and evaluate installation options accurately.
Typical backyard hockey rink Winnipeg cost ranges:
DIY kit installation (mid-size rink, basic boards and liner): $800 – $2,500 in materials, plus homeowner labour
Professional basic installation (site prep, quality boards, appropriate liner): $3,000 – $6,000
Professional mid-size rink with levelling (8 by 12 metres, quality system): $5,000 – $10,000
Premium full backyard rink (10 by 15 metres+, steel frame, heavy liner, lighting): $10,000 – $20,000+
Annual maintenance supplies (liner replacement, board repairs, flooding hose): $200 – $600 per season
These ranges reflect Winnipeg labour and material costs. The investment in professional installation consistently produces better first-season ice quality and fewer ongoing maintenance complications than budget DIY approaches — a calculation that becomes particularly clear when a failed liner or inadequately levelled site forces mid-season remediation.
For a broader understanding of backyard rink installation scope and planning, the complete guide to outdoor rink installation in Winnipeg provides additional detail on site requirements and system selection.
Integrating a Backyard Rink With Your Overall Landscape
A backyard hockey rink occupies significant yard space through winter, and its relationship to the rest of the landscape deserves consideration in both installation planning and the broader property design.
Rink Location and Lawn Protection
The rink liner and boards placed on a lawn area through winter affect the turf beneath. Extended ice coverage compresses and potentially damages grass, and the wet conditions at the rink perimeter during spring melt stress lawn edges. Selecting an installation location that minimizes impact on high-quality lawn areas — or accepting that the rink footprint will need overseeding or sod repair in spring — is part of honest installation planning.
For properties where lawn quality is a priority, coordinating rink placement with professional sod installation for spring repair ensures the lawn recovers cleanly after the rink season without leaving patchy areas through summer.
Lighting for Evening Skating
A backyard rink without lighting is unusable in the evenings — which represent a significant portion of available skating time during Winnipeg's short winter days. Dedicated rink lighting, mounted on poles or structures at the rink perimeter, extends usable hours dramatically and transforms the rink into an evening gathering point for family and neighbours.
LED lighting designed for cold-temperature operation is the appropriate choice for Winnipeg conditions. Standard incandescent or fluorescent fixtures lose significant output in cold temperatures and have short service lives when exposed to the freeze-thaw stress of a Manitoba winter installation.
If your property already has landscape lighting, extending a circuit to the rink perimeter may be straightforward — a consideration worth discussing with your installation professional during the planning phase rather than as a retrofit.
Connecting Rink and Landscape Features
Properties with patios, fire pits, and outdoor seating areas can integrate the backyard rink into a broader winter outdoor living concept. A fire pit adjacent to the rink perimeter — at safe distance from the boards and liner — creates a warming station that extends time spent outdoors around the rink. A covered area or three-season structure adjacent to the rink provides a skate-change space and weather protection that meaningfully improves the rink experience.
If a fire pit installation is already planned or in place, consider its proximity to the planned rink location at the design stage — coordinating these features produces a more cohesive winter outdoor space than installing them independently without regard for how they work together.
Ready to Build Your Backyard Hockey Rink in Winnipeg?
A professionally installed backyard hockey rink Winnipeg property can support is one of the most rewarding winter investments a Manitoba family can make — delivering months of reliable skating, bringing family and neighbours together, and turning the longest season into one everyone looks forward to. Bulger Brothers Landscape brings the site assessment expertise, installation quality, and Manitoba climate knowledge to build a rink that delivers great ice from the first flood through the end of the season. Visit the team at 7 Leeward Pl, Winnipeg, MB R3X 1M6 or call (204) 782-0313 to discuss your yard, your vision, and what a professionally built backyard rink would look like for your property this winter.
Conclusion
Winnipeg is genuinely one of the best cities in the world to own a backyard hockey rink — and a properly planned and installed backyard hockey rink Winnipeg property supports is one of the most rewarding investments a family can make in their winter outdoor experience. The cold arrives reliably, stays long enough to build and maintain excellent ice, and the culture around the game makes a backyard rink something the whole neighbourhood gravitates toward through the long Manitoba winter.
The difference between a rink that delivers five months of great ice and one that frustrates from the first flood comes down to site preparation, component quality, and flooding discipline. Get those fundamentals right from the start — with professional installation that accounts for site levelling, appropriate liner selection, and quality board systems — and your family will be skating on excellent ice by December every year. Bulger Brothers Landscape is ready to help you build that rink and make this winter the one your family remembers. Reach out today and let's get started.
Common Questions About Backyard Hockey Rink Winnipeg
Q: When can I set up a backyard hockey rink in Winnipeg?
A: Board installation and liner placement can be done before the freeze — typically October or early November — so the rink is ready for the first flooding opportunity. The first flood should wait for sustained temperatures of -10°C or colder, which in Winnipeg typically arrives in late November. Most well-built Winnipeg rinks are skateable by early December in a normal winter.
Q: How much does a backyard hockey rink cost in Winnipeg?
A: Costs range from approximately $800 to $2,500 in materials for a DIY installation to $5,000 to $10,000 for professional installation of a mid-size rink with proper site preparation and quality components. Premium large-format rinks with steel framing, heavy liners, and lighting can reach $15,000 to $20,000. Annual maintenance supply costs typically run $200 to $600 depending on liner replacement needs and board maintenance.
Q: How thick should the ice be on a backyard rink before skating?
A: A minimum of 5 to 7 centimetres of ice is recommended for recreational skating by children and adults of average weight. For hockey play with older or larger players, 10 centimetres or more provides a safer margin. Check thickness at multiple points across the rink — particularly at the ends and near the boards — since ice thickness varies with grade and flooding technique.
Q: How do I prevent my backyard rink from leaking in Winnipeg?
A: Proper liner selection and installation prevents most leaks. Use a liner of appropriate thickness for your intended use — minimum 10 mil for hockey, 20 mil or heavier for heavy-use installations. Ensure the liner has adequate overlap over the top of the boards on all sides. Check board-to-liner contact points after the first flood and address any gaps before they become established leak paths.
Q: What is the best liner for a backyard hockey rink in Winnipeg?
A: A white polyethylene liner of 10 to 20 mil thickness is the standard for Winnipeg backyard rinks. White liners improve puck visibility and give the ice a traditional rink appearance. Thicker liners — 20 mil and above — are recommended for hockey use where puck impacts, skate edge pressure, and physical contact create stress that thinner liners don't tolerate as well. Pre-cut liners sized to your rink dimensions eliminate the excess material folding that creates ice quality problems.
Q: Can I build a backyard rink on a sloped yard in Winnipeg?
A: A modest slope — less than 15 centimetres across the rink footprint — can be managed by building up the boards on the low side to contain the water as it freezes level. More significant slope makes quality ice construction difficult and typically warrants professional yard levelling before installation. Attempting to flood a significantly sloped rink without corrective site preparation produces ice that is dangerously thin at the high end and structurally inadequate at the low end.
Q: How do I maintain good ice through warm spells in a Winnipeg winter?
A: Winnipeg winters do include warm periods — temperatures rising above freezing for a day or two before dropping again. During warm spells, avoid skating on softened ice that can be damaged by skate cuts more easily than cold hard ice. When temperatures drop again, flood the damaged surface with thin layers in cold conditions — -10°C or colder — to rebuild a smooth surface. Consistent reflooding after warm periods prevents accumulated surface damage from making ice unskatable.
Q: How long does a backyard hockey rink last in Winnipeg each season?
A: A well-built Winnipeg backyard rink typically supports skating from early December through mid to late March — approximately three to four months. The season length varies with winter conditions. In strong winters with early sustained cold and late spring warmth, the season can extend to nearly five months. Mild winters with frequent above-zero periods through January and February shorten the reliable skating window.
Q: Should I remove snow from my backyard rink before flooding?
A: Always. Flooding over snow produces white, opaque, soft ice that skates poorly and deteriorates quickly. Even a light dusting of snow should be cleared before flooding. Use a rink shovel with a plastic or rubber blade edge — metal shovels damage the liner and ice surface. For heavy snowfall, a snow blower sized appropriately for the rink width clears snow quickly and thoroughly before flooding conditions arrive.
Q: Does a backyard hockey rink damage the lawn underneath it in Winnipeg?
A: Some impact on the turf beneath the rink footprint is normal — the combination of extended ice coverage, moisture at the perimeter, and physical installation and removal activity affects the lawn in that area. Most lawns recover reasonably well through the spring growing season, particularly with overseeding of any thin areas. For properties where lawn quality is a priority, budgeting for spring overseeding or targeted sod repair in the rink footprint is part of honest rink ownership planning in Winnipeg.