

Essential Maintenance Tips for Winnipeg Backyard Ice Rinks
Backyard ice rinks transform Manitoba winters into months of family recreation, neighborhood gatherings, and cherished memories. However, maintaining pristine skating surfaces throughout Winnipeg's demanding climate requires consistent attention, proper techniques, and understanding of how temperature fluctuations, snowfall patterns, and daily use affect ice quality. Mastering backyard ice rink maintenance tips Winnipeg homeowners can apply throughout the season makes the difference between smooth, enjoyable skating and frustrating rough surfaces that diminish your winter investment.
Bulger Brothers Landscape serves Winnipeg families maintaining backyard rinks, providing professional snow clearing and seasonal property care that supports winter recreation. Proper rink maintenance combines preventive care, timely interventions, and understanding regional conditions affecting outdoor ice in Manitoba's unique climate.
Key Takeaways
Regular flooding schedules maintain smooth ice surfaces throughout winter's temperature fluctuations
Prompt snow removal after each snowfall prevents ice deterioration and surface damage
Temperature monitoring guides optimal flooding times maximizing ice quality
Proper board and liner maintenance extends rink lifespan while preventing expensive repairs
Winnipeg's freeze-thaw cycles demand adaptive maintenance strategies responding to changing conditions
Professional snow clearing services free time for skating while protecting ice surface quality
Overview
This comprehensive guide provides Winnipeg homeowners with practical backyard ice rink maintenance strategies covering every aspect of winter rink care. You'll discover optimal flooding techniques for building and maintaining ice surfaces, learn snow clearing methods protecting against damage, and understand daily maintenance routines keeping rinks in prime condition.
We'll explore how Winnipeg's specific climate patterns affect rink maintenance, explain equipment needs for different maintenance tasks, and provide troubleshooting solutions for common problems. The guide covers seasonal preparation starting with initial rink construction, discusses mid-winter maintenance during extended cold periods, and outlines spring removal protecting lawns from damage.
The FAQ section addresses homeowner questions about flooding frequency, ice thickness requirements, and dealing with Manitoba's notorious temperature swings. Bulger Brothers Landscape brings winter property maintenance expertise to residential landscapes throughout Winnipeg, understanding how backyard rinks integrate into comprehensive seasonal property care.
Building Quality Ice Foundations
Initial Flooding Strategies
Start building ice when consistent temperatures remain below -5°C both day and night. Premature flooding during marginal temperatures wastes water and creates poor ice foundations. Monitor Weather Network forecasts ensuring cold weather persists for at least 3-5 days before beginning initial floods. According to Environment and Climate Change Canada, Winnipeg typically reaches appropriate conditions in late December or early January, though timing varies annually.
Apply thin initial layers—approximately 1/4 to 1/2 inch per flooding—allowing each layer to freeze completely before adding the next. Rushing ice construction through thick floods creates uneven surfaces, air bubbles, and weak ice structures that crack under use. Building quality foundations takes patience spanning 5-7 days of repeated thin flooding achieving final thickness of 3-4 inches.
Use cold water rather than hot despite common misconceptions. Hot water creates surface smoothness initially but causes uneven freezing patterns, air pocket formation, and structural weakness. Cold water freezes uniformly from top to bottom creating stronger, more consistent ice. Fill from rink center working outward ensuring even distribution and preventing edge buildup.
Temperature Considerations for Flooding
Optimal flooding occurs when temperatures sit between -5°C and -15°C. Warmer conditions near zero slow freezing allowing water to flow unevenly before solidifying. Extreme cold below -20°C freezes water so quickly that spray nozzles ice up and surface imperfections lock in place before water can level naturally.
Nighttime flooding works best because dropping temperatures through evening hours freeze water progressively as you work. Daytime flooding during sunny periods allows sun exposure to melt fresh water layers before they freeze properly. Plan flooding sessions for late evening hours—typically 9 PM to midnight—maximizing overnight freezing time.
Wind conditions affect flooding quality significantly. Calm evenings allow water to settle evenly, while windy conditions blow water creating uneven thickness and surface waves that freeze in rough patterns. Monitor wind forecasts choosing calm nights for flooding sessions whenever possible.
Equipment for Ice Construction
Quality hoses rated for cold weather remain flexible in freezing conditions. Standard garden hoses crack and become unmanageable below -10°C. Invest in cold-weather hoses costing $40-$80 that stay pliable throughout winter. Drain hoses completely after each use preventing internal freezing that splits hose walls.
Flooding attachments create different surface finishes. Wide spray nozzles distribute water evenly for initial layers, while fine mist sprayers work better for finishing floods creating glass-smooth surfaces. Some families use hot water tank refill hoses without nozzles, relying on gentle water flow for even distribution. Experiment finding methods delivering results matching your expectations.
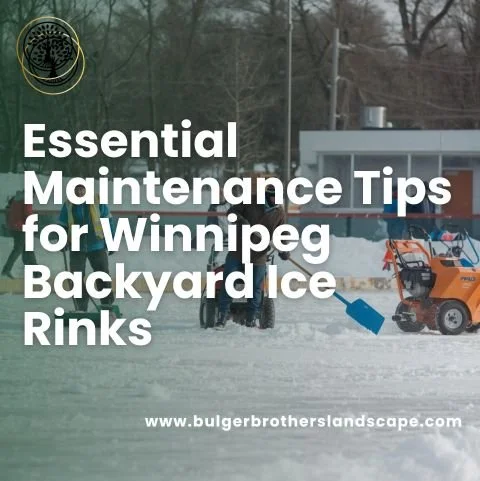
Snow removal equipment becomes critical after initial ice construction. Wide plastic shovels, soft-bristle push brooms, and potentially rink-specific snow removal tools maintain surfaces without damage. Professional residential ice rink snow clearing services provide this specialized maintenance freeing families to focus on skating rather than spending hours on snow removal after each accumulation.
Daily and Weekly Maintenance Routines
Snow Clearing Best Practices
Clear snow within 4-8 hours after snowfall ends preventing ice deterioration from insulation effects and melt-refreeze cycles. Fresh snow removes easily using soft-bristle push brooms for light accumulations or wide plastic shovels for heavier snowfalls. Work from rink center outward in systematic patterns preventing repeated crossing of cleared areas that compact snow into ice.
Never use metal shovels, aggressive snow blowers set too low, or standard plow equipment on ice surfaces. These tools create gouges, scratches, and uneven surfaces ruining skating quality. If using snow blowers, set auger heights 1-2 inches above ice surfaces operating at lower power settings. Test in small areas before clearing entire rinks ensuring equipment settings protect surfaces adequately.
Remove cleared snow completely from rink areas rather than piling on ice surfaces or immediately adjacent to boards. Snow piles on ice insulate surfaces causing melting underneath, while perimeter piles can melt back onto ice during warm periods. Dispose of cleared snow in surrounding yard areas maintaining drainage away from rink structures. Bulger Brothers Landscape provides professional snow clearing using ice-safe equipment and proper techniques, protecting your investment while saving hours of physical labor after each snowfall.
Surface Flooding and Resurfacing
Resurface ice every 3-7 days during regular use depending on skater traffic and temperature conditions. Heavily used rinks with daily skating need more frequent flooding, while occasional-use rinks maintain quality with weekly resurfacing. Apply thin water layers—just enough to fill surface scratches and create smooth finishes—rather than thick floods that take excessive time to freeze.
Flood after skating sessions rather than before allowing fresh ice to freeze undisturbed overnight. Skating on partially frozen resurfacing layers creates permanent marks and rough spots. Evening flooding takes advantage of dropping nighttime temperatures ensuring surfaces freeze solid before morning use.
Scrape loose snow, ice shavings, and debris before flooding. These materials create bumps and rough spots when frozen into new ice layers. Use gentle techniques avoiding surface damage—soft brooms work well for general cleaning while rubber squeegees remove excess water or slush before resurfacing floods.
Crack and Damage Repair
Address small cracks immediately before they expand into major problems. Fill hairline cracks with water allowing it to freeze and seal separations. Larger cracks require clearing loose ice from crack interiors, then flooding with multiple thin layers building up repair material gradually. Severe cracks wider than 1/4 inch may indicate ice thickness problems or board movement requiring more comprehensive solutions.
Surface gouges from equipment damage or rough play need smoothing through targeted flooding. Build up damaged areas with several thin water applications allowing each to freeze before adding the next. Once repairs reach surrounding ice levels, overall resurfacing integrates repairs into general surface finish.
Monitor high-traffic areas—near goals, along boards, and in center ice face-off zones—for accelerated wear. These spots may need localized flooding between general resurfacing sessions maintaining consistent surface quality across entire rinks. Preventive attention to developing problems costs less time and water than addressing severe deterioration later.
Edge and Board Maintenance
Check board-to-ice seals regularly ensuring snow and water don't infiltrate behind ice edges. Gaps allow moisture to accumulate, freeze, and expand—potentially lifting ice edges or damaging board attachments. Pack snow tightly into any gaps creating temporary barriers, or use additional flooding along edges sealing separations.
Inspect board brackets, braces, and connections for loosening from freeze-thaw cycling and ice pressure. Tighten hardware as needed preventing board movement that creates ice edge problems or structural instability. Some shifting naturally occurs—boards should be checked weekly addressing issues promptly before they compromise rink integrity.
Clear accumulated snow from board tops and exterior areas preventing excessive weight on structures. Heavy snow loads stress connections and can damage boards through persistent pressure. Maintain clean board exteriors also improving rink appearance and allowing inspection of board conditions throughout winter.
Managing Winnipeg's Variable Weather Conditions
Handling Temperature Fluctuations
Winnipeg experiences dramatic temperature swings—from -30°C deep freezes to near-zero warm spells sometimes within single weeks. These fluctuations challenge ice maintenance requiring adaptive strategies. During cold snaps below -20°C, ice becomes brittle and susceptible to cracking from expansion-contraction cycles. Light flooding during extreme cold maintains surface quality without stressing underlying ice structures.
Warm periods above -5°C soften ice surfaces and can cause partial melting creating rough conditions when temperatures drop again. During warm spells, avoid flooding which won't freeze properly and may create surface water that refreezes into bumpy ice. Focus on light maintenance—gentle snow clearing if needed, debris removal—waiting for cold returns before resurfacing.
Freeze-thaw cycles create the most challenging conditions. Surface melting during above-zero daytime temperatures followed by overnight refreezing creates rough, bumpy ice requiring extensive resurfacing. After significant thaw periods, consider complete resurfacing with multiple flooding sessions rebuilding smooth surfaces rather than attempting quick fixes that won't adequately address deterioration.
Snow Management Strategies
Winnipeg winters bring frequent light snowfalls rather than constant heavy storms. This pattern demands regular clearing—multiple times weekly during active periods—maintaining ice quality through consistent attention. Even 1-2 inch accumulations warrant removal preventing the insulating effects and surface bonding that degrade ice with repeated light snowfalls.
Heavy wet snow common during spring creates the most clearing challenges. This dense snow weighs more, adheres to ice more firmly, and can damage surfaces through its weight if left too long. Prompt clearing becomes especially critical during wet snow events. Professional services like those from Bulger Brothers Landscape handle challenging snow conditions effectively using commercial equipment and experienced techniques.
Plan for overnight clearing after evening snowfalls. Many families want rinks ready for before-school skating or weekend morning use. Late-night or very early morning clearing delivers ready-to-use surfaces matching family schedules. Some homeowners invest in outdoor lighting enabling comfortable evening maintenance work.
Wind Protection Considerations
Exposed rinks suffer from wind effects that create uneven ice during flooding and accelerate ice deterioration through sublimation—ice directly converting to water vapor without melting. Windbreaks using snow fences, temporary screens, or natural barriers like hedges improve flooding results and slow ice degradation between maintenance sessions.
Wind-driven snow accumulates unevenly across rinks, often creating deep drifts along one side while leaving other areas nearly clear. These uneven accumulations complicate clearing and can create ice thickness variations if snow insulates some areas while exposing others to cold air. Strategic snow fence placement manages drift patterns directing accumulation to less critical areas.
Skating in windy conditions becomes unpleasant and potentially dangerous from wind chill. While maintenance can't control weather, understanding wind patterns helps schedule skating sessions during calmer periods maximizing family enjoyment from your rink investment.
Seasonal Preparation and Spring Removal
Fall Rink Construction
Install boards and liners in late November or early December before ground freezes completely. Driving stakes or securing board systems becomes much harder in frozen ground. Complete construction during mild fall weather allowing adjustment and testing before ice building begins.
Level rink areas as thoroughly as possible before installing liners. Significant ground variations create ice thickness differences—thin areas that crack easily and thick spots wasting water. Use sand or snow to fill low areas creating more uniform bases. Some families install semi-permanent frames remaining in place year-round simplifying annual setup.
Test liner integrity before flooding checking for holes, tears, or weak seams. Small damage discovered early allows affordable repairs, while flooding through damaged liners wastes water and creates maintenance headaches. Purchase liner repair kits or heavy-duty tape addressing minor damage preventing flooding failures.
Mid-Winter Extended Maintenance
During long cold stretches without thaws, ice continues accumulating thickness from repeated flooding. Monitor thickness ensuring adequate depth—3-4 inches minimum—without excessive buildup consuming rink depth and reducing skating room between ice surface and board tops. Avoid unnecessary flooding during extended cold when surfaces remain in good condition.
Heavy use patterns might require equipment maintenance mid-season. Board connections may loosen from constant impact and temperature cycling. Liner areas showing wear from skate traffic might need protection or monitoring for developing holes. Take advantage of warm periods when rinks are temporarily unusable for structural inspection and any needed repairs.
Some families maintain multiple rinks—perhaps a small practice area plus full-size family rink, or separate areas for different age groups. Coordinate maintenance across multiple surfaces balancing time investment against ice quality needs for different usage patterns.
Spring Breakdown and Lawn Protection
Remove ice as early as practical in spring protecting underlying grass from extended coverage damage. Once nighttime temperatures consistently stay above freezing and ice begins deteriorating, drainage becomes preferable to leaving degrading ice in place. Drill holes or create channels allowing meltwater to drain preventing prolonged flooding of grass areas.
Break boards down carefully storing components for following season. Clean boards removing dirt, ice residue, and any accumulated debris. Dry thoroughly before storage preventing mold growth and wood deterioration. Organized storage with labeled components simplifies fall setup.
Remove liners folding or rolling for compact storage once completely dry. Damaged areas should be marked or repaired before storage preventing forgotten problems that resurface during next season's setup. Store liners away from rodents that may chew plastic material creating holes requiring replacement.
Lawn recovery from rink coverage takes time and care. Grass covered throughout winter emerges pale, matted, and stressed. Avoid walking on recovering lawn areas allowing grass to strengthen naturally. Light fertilizing in late spring supports recovery, though extreme fertilization can damage stressed grass. Most lawns recover completely within 4-6 weeks given time and normal care. Understanding comprehensive residential snow removal services near me helps homeowners coordinate complete winter property maintenance including both regular snow clearing and specialized rink care.
Troubleshooting Common Rink Problems
Addressing Ice Quality Issues
Rough, bumpy ice often results from flooding during inappropriate temperatures, inadequate snow clearing allowing accumulation to freeze into surfaces, or skating on partially frozen resurfacing layers. Solutions involve complete resurfacing during optimal temperature conditions—multiple thin floods over 2-3 days rebuilding smooth surfaces. Scrape particularly rough areas before flooding removing frozen irregularities that won't smooth through flooding alone.
Cloudy or opaque ice indicates air bubbles trapped during freezing, often from flooding with thick water layers or during extreme cold when rapid freezing locks in air pockets. While cloudy ice remains functional, achieving crystal-clear ice requires patient thin flooding allowing gases to escape as water freezes gradually. Most backyard rinks accept some cloudiness focusing on surface smoothness rather than aesthetic clarity.
Soft spots or areas that remain slushy indicate insufficient ice thickness, underground heat sources like buried utilities or septic fields, or poor liner sealing allowing ground moisture to compromise ice from below. Identify causes—use stakes to measure ice thickness in soft areas, review property features for heat sources, inspect liners for leaks. Solutions depend on causes and may include additional flooding, liner repairs, or accepting that some areas won't maintain perfect ice.
Solving Structural Problems
Board movement or instability usually stems from inadequate anchoring, loosened connections from freeze-thaw cycling, or uneven ground settlement. Re-anchor loose sections using additional stakes or weights. Tighten all connection hardware checking entire perimeter rather than just obviously loose areas. Seriously unstable boards may require partial dismantling and reconstruction addressing underlying support problems.
Liner failures including tears, holes, or seam separations waste water and create unmanageable flooding situations. Patch small damage using liner repair kits or heavy-duty waterproof tape. Extensive damage may require liner replacement mid-season—expensive and time-consuming but necessary for maintaining functional rinks. Regular inspections catch developing problems before they become catastrophic failures.
Drainage problems where water pools in specific areas during flooding suggest ground variations creating low spots. Build up low areas using snow or sand before next season's construction, or adjust flooding techniques directing water away from problem areas until ice thickness compensates for variations. Persistent drainage issues may indicate ground preparation needs for following seasons.
Managing User-Related Damage
Heavy skating traffic, hockey play, and general use gradually degrade ice requiring more frequent resurfacing than light recreational skating. Set realistic expectations—active hockey play means daily or every-other-day resurfacing maintaining acceptable quality. Light family skating extends resurfacing intervals to weekly schedules.
Equipment damage from nets, goals, or accessories dragged across ice creates scratches and gouges. Lift equipment rather than dragging whenever possible. Repair damaged areas through localized flooding building up gouges before general resurfacing sessions. Consider protective measures—rubber feet on goal posts, designated equipment zones—preventing recurring damage.
Excessive edge wear near boards from repeated stopping and turning concentrates damage in specific areas. These zones need targeted attention during resurfacing—extra flooding building up worn areas maintaining level surfaces. Accept that high-traffic zones require more maintenance rather than attempting to restrict use defeating rink recreation purposes.
Equipment and Supply Recommendations
Essential Maintenance Tools
Invest in quality cold-weather hoses ($40-$80) maintaining flexibility throughout winter rather than standard hoses that crack in freezing conditions. Multiple hoses allow reaching all rink areas without constantly repositioning single hoses. Brass fittings resist freezing better than plastic connections.
Snow clearing tools including wide plastic shovels ($20-$40), soft-bristle push brooms ($30-$60), and potentially rink-specific scrapers ($25-$50) protect ice while removing accumulation efficiently. Avoid metal tools or aggressive equipment damaging surfaces. Building complete toolkits costs $75-$200 providing everything needed for professional-quality maintenance.
Thermometers mounted near rinks provide real-time temperature monitoring guiding flooding decisions. Digital outdoor thermometers with wireless display ($25-$50) allow checking conditions from indoors. Weather apps and forecasts supplement but don't replace on-site monitoring showing actual microclimate conditions affecting your specific rink.
Optional Enhancement Equipment
Hot water systems using hot water tanks or tankless heaters create smoother ice finishes than cold water flooding. However, installation costs ($500-$2,000+) and operational complexity make hot water optional enhancements rather than requirements. Many families achieve excellent results using cold water with proper technique.
Lighting systems extend usable hours enabling evening skating and night maintenance work. Basic pole lights cost $200-$500, while elaborate systems with multiple fixtures and controls reach $1,000-$3,000+. Consider electricity costs—outdoor lighting consumes substantial power during extended winter evenings.
Rink resurfacing tools including squeegees, specialized ice scrapers, and commercial-style flooding equipment help serious rink maintainers achieve arena-quality results. These professional-grade tools cost more ($50-$200 each) but deliver superior outcomes for families prioritizing ice quality. Understanding how much does residential snow plowing cost helps budget comprehensively for winter property maintenance including both professional services and DIY equipment investments.
Replacement Supply Planning
Liners typically last 3-5 seasons with careful use and proper storage. Budget $200-$500 for replacement liners depending on rink size. Inspect liners each spring marking damage and estimating remaining lifespan. Purchase replacements during off-season when prices may be better than mid-winter emergency purchases.
Board systems last decades with proper maintenance but individual components may need replacement. Keep spare brackets, connection hardware, and board sections for emergency repairs. These small parts cost $5-$30 each and prevent minor problems from ending skating seasons prematurely.
De-icing products for clearing walkways to rinks maintain safe access. Use ice-safe products avoiding rock salt that damages nearby grass when spring melting occurs. Pet-safe ice melt ($15-$30 per bag) provides safer alternatives for families with animals.
For comprehensive winter property maintenance including professional backyard ice rink snow clearing, seasonal driveway plowing, and complete outdoor care throughout Winnipeg's demanding climate, Bulger Brothers Landscape delivers experienced service. Our team at 7 Leeward Pl, Winnipeg, MB R3X 1M6 understands the unique challenges Manitoba winters create for residential properties and backyard rinks. Contact us at (204) 782-0313 to discuss your winter maintenance needs, explore professional snow clearing options, and receive customized service proposals supporting your family's outdoor winter recreation throughout the season.
FAQs
Q: How often should I flood my backyard ice rink in Winnipeg?
A: Resurface your rink every 3-7 days depending on use levels and weather conditions. Heavily used rinks with daily skating need flooding every 2-3 days maintaining smooth surfaces, while occasional-use rinks extend to weekly schedules. Apply thin water layers just filling scratches rather than thick floods taking excessive time to freeze. Flood during evening hours between -5°C and -15°C for best results. After warm periods causing ice deterioration, more frequent resurfacing rebuilds quality. Monitor surface conditions rather than following rigid schedules—flood when skating quality declines regardless of intervals.
Q: What temperature is best for flooding a backyard ice rink?
A: Optimal flooding temperatures range between -5°C and -15°C. Warmer conditions near zero slow freezing allowing uneven water flow, while extreme cold below -20°C freezes water so quickly that surface imperfections lock in place before water levels naturally. Nighttime flooding during dropping temperatures works best—typically 9 PM to midnight—maximizing overnight freezing time. Avoid flooding during sunny daytime periods when sun exposure melts fresh layers before proper freezing. Monitor forecasts ensuring stable cold persists several hours after flooding for complete surface freezing.
Q: How thick should backyard ice rink ice be?
A: Maintain minimum ice thickness of 3-4 inches for safe skating and good durability. Build ice gradually through multiple thin floods rather than attempting thick single applications. Initial construction takes 5-7 days of repeated 1/4 to 1/2 inch floods achieving proper thickness. Throughout winter, continued resurfacing adds incremental thickness. Monitor depth using stakes or rulers ensuring adequate thickness especially after warm periods that may have melted surfaces. Excessive thickness beyond 5-6 inches wastes water and reduces skating depth between ice and board tops.
Q: How do I prevent my backyard ice rink from cracking?
A: Prevent cracking through gradual ice building with thin floods, maintaining consistent thickness across entire rinks, and avoiding flooding during extreme cold below -20°C when rapid freezing creates stress. Address small cracks immediately before they expand—fill with water allowing it to freeze and seal separations. Monitor board stability—movement from loosening creates ice stress causing cracks. Avoid driving or placing heavy equipment on ice. Temperature fluctuations naturally create some cracking; focus on minimizing severe cracks through proper maintenance rather than expecting perfect crack-free ice.
Q: What's the best way to clear snow from my ice rink without damaging it?
A: Use soft-bristle push brooms for light snow or wide plastic shovels with smooth edges for heavier accumulation. Never use metal shovels, aggressive snow blowers, or standard plow equipment that gouge surfaces. If using snow blowers, set augers 1-2 inches above ice operating at low power. Clear within 4-8 hours after snowfall preventing snow from bonding to ice. Work from center outward in systematic patterns. Remove cleared snow completely from rink areas rather than piling on ice. Professional services like residential ice rink snow clearing use specialized ice-safe equipment protecting surfaces while completing clearing in fraction of DIY time.
Q: Can I use hot water to flood my backyard ice rink?
A: While hot water creates initially smoother surfaces, cold water builds stronger, more consistent ice. Hot water causes uneven freezing patterns, air pocket formation, and structural weakness. Cold water freezes uniformly top to bottom creating durable ice. Most Winnipeg families achieve excellent results using cold water with proper thin-flooding techniques. Hot water systems require expensive equipment ($500-$2,000+) and complex installation. Unless you're pursuing arena-quality perfection, cold water delivers satisfactory results at far lower cost and complexity.
Q: How do I deal with Winnipeg's temperature fluctuations affecting my rink?
A: Adapt maintenance to conditions—during cold snaps below -20°C, reduce flooding frequency as ice remains stable but becomes brittle. In warm periods above -5°C, avoid flooding that won't freeze properly and focus on debris removal. After freeze-thaw cycles creating rough ice, plan complete resurfacing with multiple floods over 2-3 days. Monitor forecasts timing maintenance during optimal temperature windows. Accept that Manitoba's variable climate means inconsistent ice quality—focus on maximizing good skating days rather than expecting perfect conditions throughout winter. Understanding best drainage cleaning services near me and other comprehensive property services shows how professional providers help homeowners manage all seasonal challenges Manitoba weather creates.
Q: When should I start building my backyard ice rink in Winnipeg?
A: Install boards and liners in late November or early December before ground freezes completely. Begin flooding when consistent temperatures remain below -5°C both day and night for at least 3-5 days. Winnipeg typically reaches appropriate conditions in late December or early January though timing varies annually. Premature flooding during marginal temperatures wastes water creating poor ice foundations. Monitor Environment Canada forecasts confirming sustained cold before starting construction. Patient timing produces better results than rushing installation during warm periods requiring extensive reflooding later.
Q: How do I remove my ice rink in spring without damaging my lawn?
A: Begin breakdown once nighttime temperatures consistently stay above freezing and ice deteriorates. Drill holes or create drainage channels allowing meltwater to escape preventing prolonged grass flooding. Remove boards and liners as early as practical—extended ice coverage stresses grass causing pale, matted conditions. Allow grass 4-6 weeks recovery time avoiding foot traffic on emerging lawn. Light spring fertilization supports recovery though excessive application can damage stressed grass. Most Winnipeg lawns recover completely with time and normal care. Store boards and liners completely dry preventing mold growth and material deterioration before next season.
Q: Do I need professional help maintaining my backyard ice rink?
A: Many families successfully maintain rinks independently using proper techniques and appropriate equipment. However, professional snow clearing services provide significant value through time savings, superior equipment, and ice-protecting techniques. A standard 40x80 foot rink takes 1-2 hours clearing manually after moderate snowfall—significant time investment repeated 20-40 times winter. Professional services complete clearing in 30-45 minutes using specialized equipment. For families prioritizing skating time over maintenance work or those with physical limitations affecting manual clearing capability, professional services from providers like Bulger Brothers Landscape deliver excellent value through convenience, time savings, and ice quality protection.